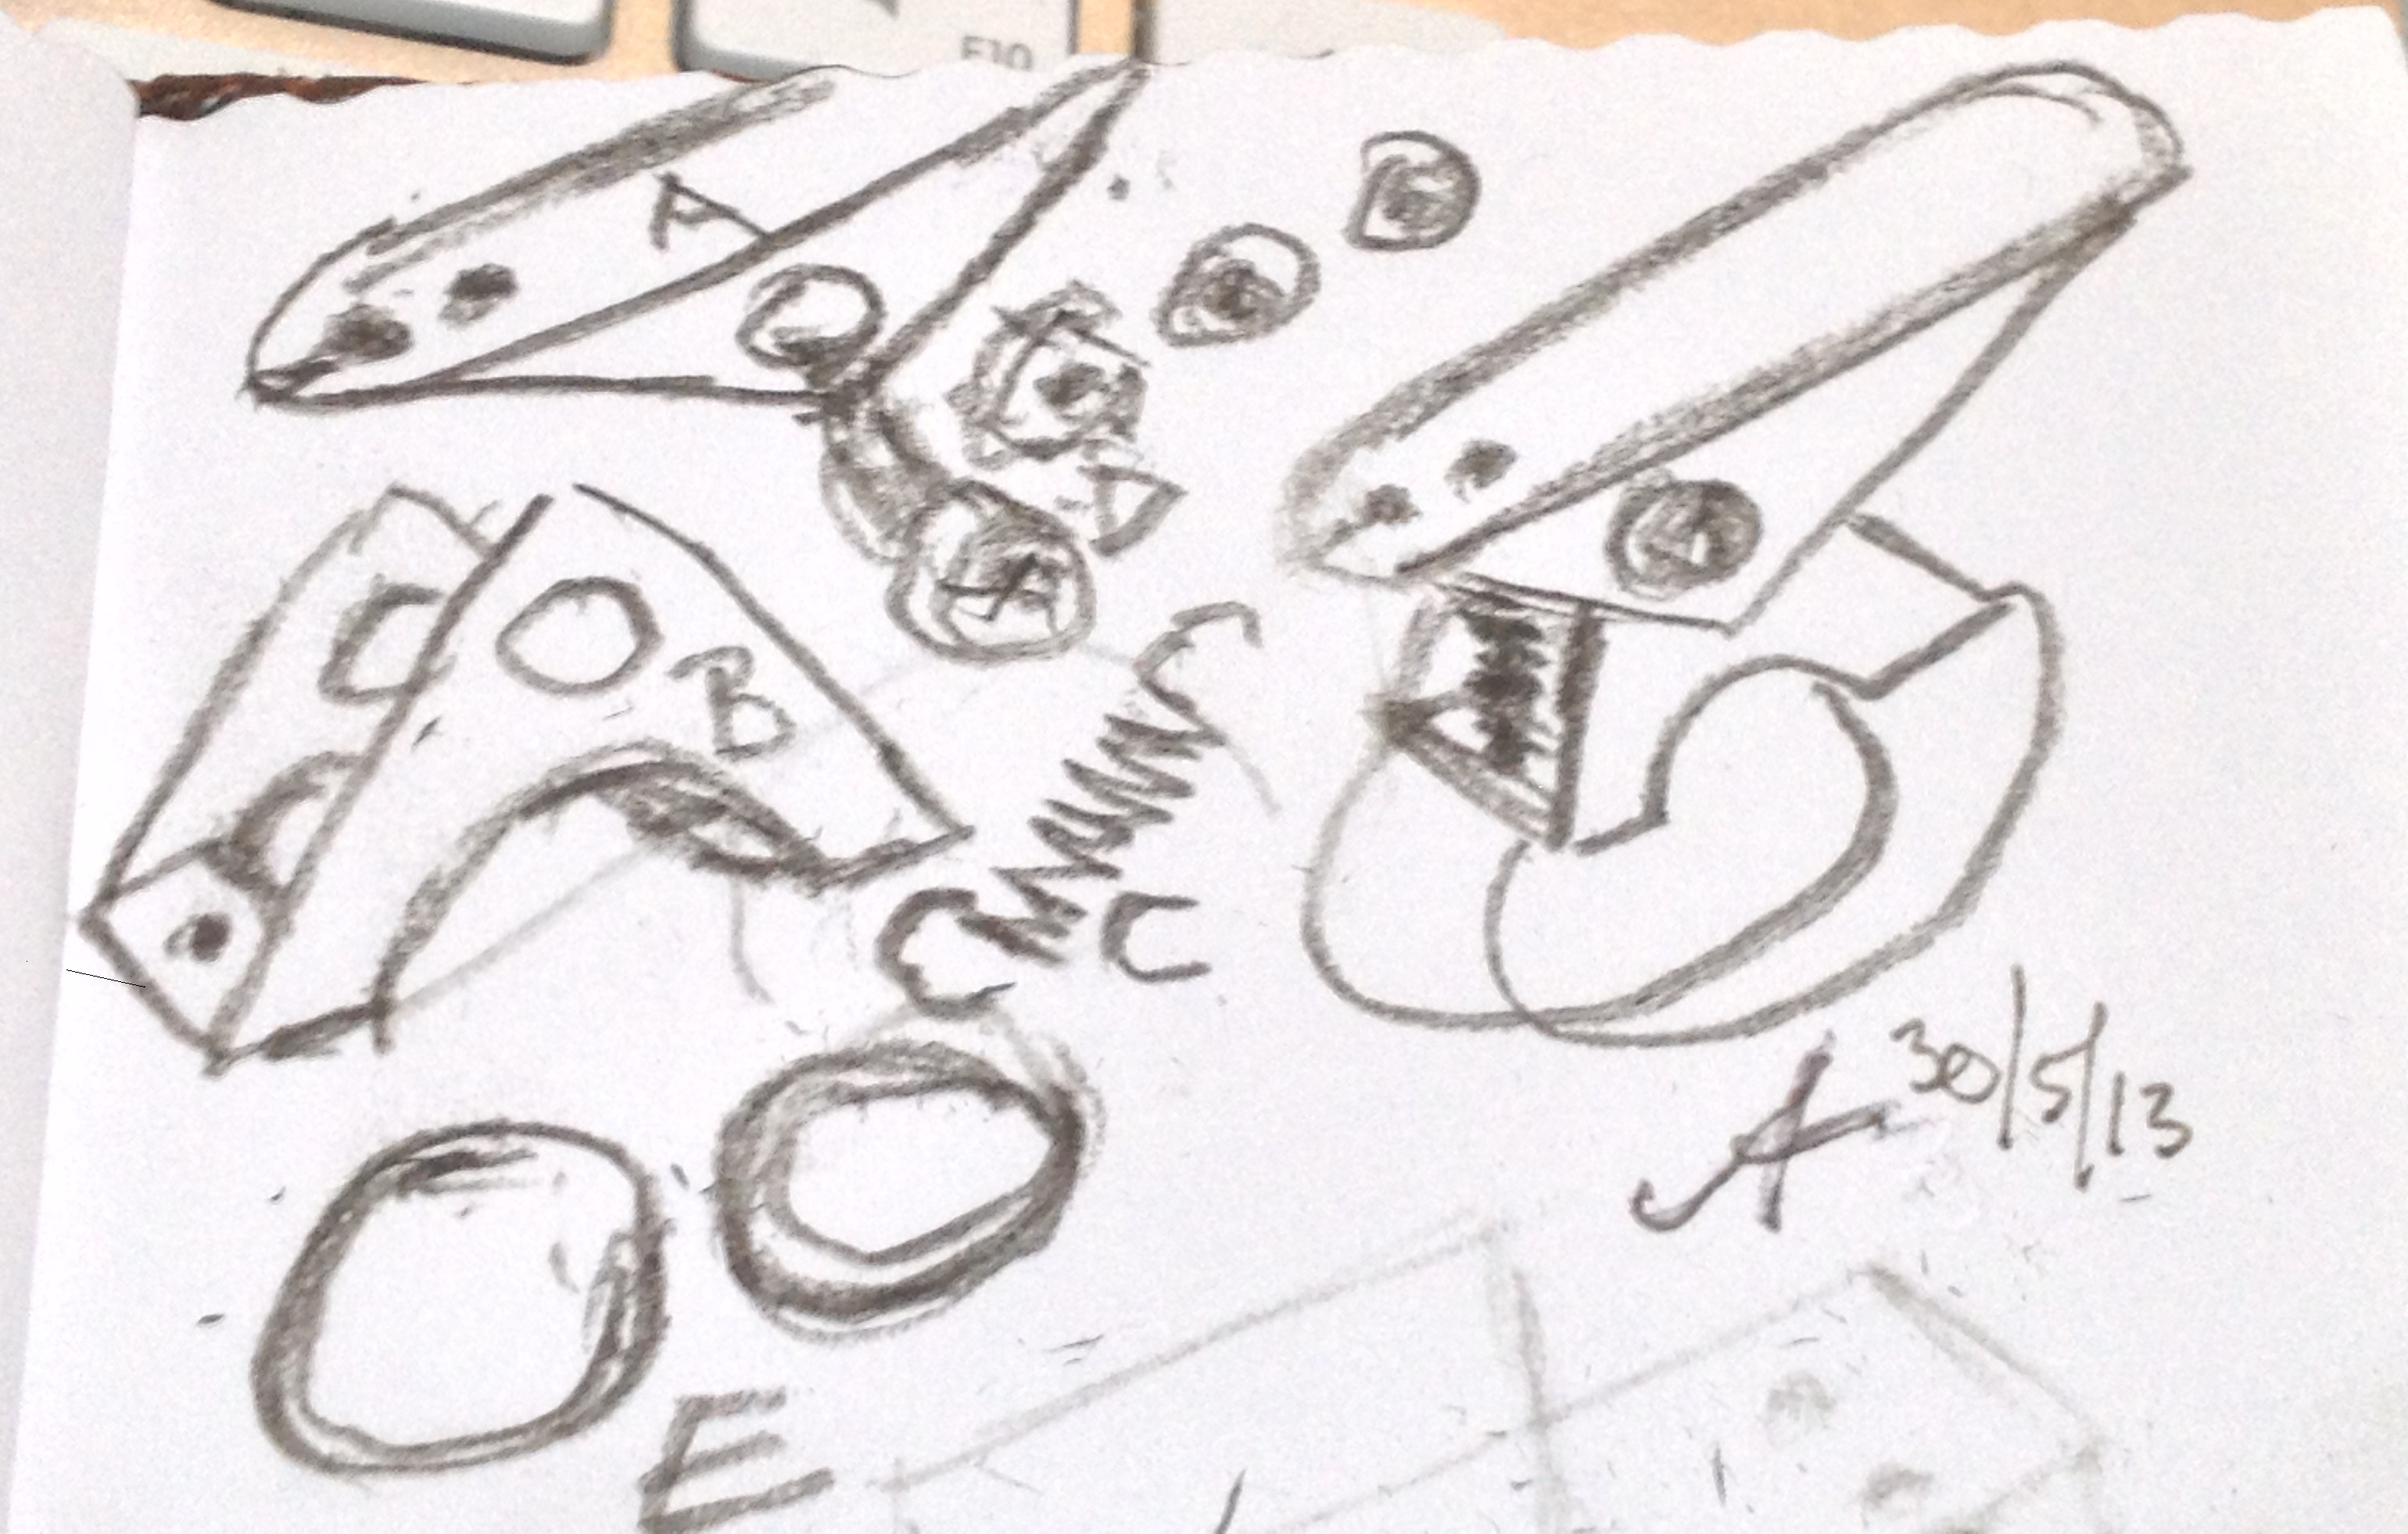
Okay, sports fans, for making me a Hero of the Soviet Union, er, of the Thorn Forum, and since you insist on drop bars with your Rohloff hub gear box, here's a gearshift mechanism you can make in an hour for a couple of bucks in parts. With apologies for the quality of the sketch -- I was on my way to making a portrait when I had the idea, and had only charcoal with me to draw with, and a small corner of a well used sketchbook -- this is what it looks like:
 This is a discussion sketch and document, not an engineering blueprint.
 The feasibility and dimensions of the device need to be discovered. Rohloff's standard rotary switch, for instance, feels like it handles a fistful of power; how much leverage will be required to match it? Eventually we'll discover whether my idea is a simple solution or merely a simplistic delusion of simplicity... Was it Einstein who said, A thing needs to be as simple as possible, but no simpler.
First off, you have to understand that the Rohloff internal gear hub doesn't use Bowden cables for the gearshift. There is no compression of the cable. The action is pull-pull, as in pull to shift down, and pull to shift up.
The components are made from a few inches of small U-section in ali for easy drilling, or steel if you have good tools, or you can bend it up from sheet if you prefer different dimensions. In addition you need, per side, a small spiral (helical) spring, a bolt, a nut, a couple of washers, and one or two O-rings or a couple of tiewraps per side. You can use the Rohloff adjusters you already have on the bike, or, since these are brake cables, use common brake adjusters. You will make two copies of
Andre's Most Economical DIY Rohloff Drop Bar Gearshift.
The lever, A, you can shape any way you want. The important things about it is the position of the three holes. There are holes across it for a shaft to pivot on, and two holes in the top near one end. One hole is slotted to insert the cable, and one hole is scaled to hook your spring into.
The pivot B is hollowed out on the bottom to the shape of the handlebar and has two holes, one for the crossbar holding the lever (A), and one for the other end of the spring (C) in the crossbar left when you hollowed it out.. If want to use tiewraps rather than O-rings (E) to hold it on, you can make slots for the tiewraps.
The bolt, washers and nut are just a bolt, washers and nut suited to the width of the assembly and the diameter of the hole for the shaft.
Assemble the whole lot on your handlebars as per the sketch to the righthand side of my illustration, and attach the cable from the Rohloff to the hole in the forward end of the lever (A). Put one asssembly onto each side of your handlebars, so that you shift up on one side and down on the other side, just like on a derailleur bike. You have to press one of the levers once each time for each gear you want to shift in either direction.
There you go, a saving of at least £149.01 over some of the touted boutique versions, plus all the pride of having done the job right yourself. Or not. If not, an interesting experiment that will leave us all knowing more about our bicycles than before, and meanwhile keep us out of the bars.
Andre Jute
A few of my books in the
UK and the
US"The brain of an engineer is a delicate instrument which must be protected against the unevenness of the ground." -- Wifredo-Pelayo Ricart Medina